Renderer
Renderer is the final piece needed to finish the rendering part of our game engine. Renderer’s main responsibilities are to:
- Accept
Spritesto be rendered - Create and manage
BufferListsto store sprites in - Bind
BufferLists and render using their data
The renderer stores a list of BufferLists which hold the
sprites that will be rendered. Field bgColor holds the
background color of the window. The view and
projection matrices are used to setup the viewing window.
The zNear and zFar parameters are used to set
the depth limits for our sprites. Finally, windowSize
stores the window size which comes from the platform package.
type Renderer struct {
    buffers          []*BufferList
    bgColor          [4]float32
    viewMatrix       [16]float32
    projectionMatrix [16]float32
    projectionCenter math.Vector2[float32]
    zNear, zFar      float32
    windowSize       math.Vector2[int]
}
Render Loop
Renderer is used in a render loop. Conceptually, a
render loop looks like this:
renderer.Init()

forever:
    for sprite in scene:
        renderer.QueueSprite(sprite)
    renderer.Render()
The code loops over all sprites that need to be rendered and adds
them to the renderer using QueueRender. This will add the
sprite’s data to one of the BufferLists in the renderer.
When all sprites have been added we trigger Render which
copies all BufferLists to the GPU and renders the sprites.
Render will empty all buffers when it finishes rendering so they must be
added in the next iteration of the loop.
Accessing all sprites in the scene depends on scene organization. In
a simple game, we can store our sprites in an array and then the pseudo
code for sprite in scene translates to code pretty easily.
For more advanced games, the scene is usually organized using a
specialized data structure. For example, some games store their objects
in a grid while others use a tree-like hierarchy. Because of this, we
leave it up to the user to traverse their scene structure and queue
sprites for rendering. We will see examples of scene organization in
future tutorials.
Initialization
Before we can use the renderer we must initialize it by calling
Init(). Init’s main job is is to call
gl.Init() which initializes OpenGL.
var WindowSize math.Vector2[int]
var OpenGLInitialized bool

func (r *Renderer) Init() {
    if err := gl.Init(); err != nil {
        panic(err)
    }

    r.bgColor = [4]float32{0.6, 0.1, 0.6, 1}

    r.viewMatrix = [16]float32{
        1, 0, 0, 0,
        0, 1, 0, 0,
        0, 0, 1, 0,
        0, 0, 0, 1,
    }

    r.EnableAlphaBlending()
    r.EnableDepthTesting()
    r.SetBGColor(r.bgColor)
    r.SetProjection(math.Vector2[float32]{0, 0}, -10000, 10000)
    r.Resize(256, 256)
    OpenGLInitialized = true
}
Other than initializing OpenGL, Init sets defaults for the Renderer
fields viewMatrix and bgColor. The view matrix
is set to the identity matrix so it does nothing by default. Background
is set to magenta to make it easy to debug black sprites.
Init then enables alpha blending and depth testing and sets the
window size to a small value since the default zero doesn’t work (we
divide by window width/height in a few places in the code). We also set
our projection matrix using SetProjection. We will see how
this works further down this tutorial.
The final step in our initialization is to set a global
OpenGLInitialized flag so that other parts of the code that
use OpenGL know its safe to proceed. For example, Atlas
needs OpenGL to be initialized to be able to create the atlas
texture.
Queue Sprites for Rendering
Users call Renderer.QueueSprite to add their sprites in
a queue to be rendered. QueueRender won’t render directly.
Instead, the sprite data is stored in a BufferList and
rendered later when the user calls Renderer.Render().
func (r *Renderer) QueueRender(sprite *Sprite) {
    // sprite's first render, cache its target buffer
    if sprite.bufferIndex < 0 {
        for i, v := range r.buffers {
            if v.RenderOrder == sprite.renderOrder &&
                v.Shader.Id == sprite.shader.Id &&
                sprite.atlas.atlasTexture == v.Texture {
                sprite.bufferIndex = i
            }
        }
        // no match found, allocate one
        if sprite.bufferIndex < 0 {
            buf, _ := NewBufferList(*sprite.shader, DefaultBufferSize,
                sprite.renderOrder, sprite.atlas.atlasTexture)
            sprite.bufferIndex = r.AddBufferList(buf)
        }
    }
    r.buffers[sprite.bufferIndex].AddSprite(sprite)
}
When a sprite is queued, we look for an appropriate
BufferList to put it in. Remember that sprites don’t hold
pixel information, they just point to locations on the atlas. Because of
this, we look for a buffer list that has the same atlas texture as our
sprite. The buffer list must also be using the same shader as our sprite
since it is possible to render sprites from the same atlas but with
different shaders.
If a match is not found, it means we are queuing this sprite for the
first time and the atlas/shader combination it uses is not present in
our renderer. In this case we must create a new BufferList.
The BufferList is added to the renderer using
AddBufferList.
func (r *Renderer) AddBufferList(store *BufferList) int {

    // find the correct index to insert
    var index int
    for ; index < len(r.buffers); index++ {
        if r.buffers[index].RenderOrder > store.RenderOrder {
            break
        }
    }

    if index == len(r.buffers) {
        r.buffers = append(r.buffers, store)
    } else {
        r.buffers = append(r.buffers[:index+1], r.buffers[index:]...)
        r.buffers[index] = store
    }
    return index
}
This code uses insertion sort to ensure that BufferLists
are added in ascending RenderOrder. When we render, this
will make it so that sprites in BufferLists with lower
render order are rendered first which is important for transparent
sprites.
When a sprite is added for the first time there will either be a
matching buffer list to put it in or a new buffer list will be created.
In both cases, we store the location of the BufferList on
the sprite itself so we don’t have to search again when we queue it for
render later. This is important for performance reasons as we will be
queuing potentially thousands of sprites multiple times each second.
Subsequent calls to QueuedRender for the same sprite only trigger the
last line of code.
Render
The render function renders using the instancing technique we saw in
tutorial 8. It first clears the OpenGL
depth and color buffers. Then, it loops over the
BufferLists stored in the renderer. For each buffer it does
the following:
- Copies the data from the CPU arrays to the GPU using
BufferList.MoveCpuToGpu() - Enables the shader with
UseProgram - Binds the VAO. This binds all buffers (vertex, uv, color etc) in that BufferList
- Binds the atlas texture
- Sets uniform parameters
viewandprojection - Draws instances of our sprite template up to the number of sprites
stored in the buffer (
NumSprites)
func (r *Renderer) Render() {
    gl.Clear(gl.COLOR_BUFFER_BIT | gl.DEPTH_BUFFER_BIT)

    // render every sprite store in RenderOrder
    for _, bf := range r.buffers {
        gl.UseProgram(bf.Shader.Program)
        gl.BindVertexArray(bf.VAO)
        gl.BindTexture(gl.TEXTURE_2D, bf.Texture)

        if err := bf.Shader.UpdateUniform("view", r.viewMatrix[:]); err != nil {
            panic(err)
        }
        if err := bf.Shader.UpdateUniform("projection", r.projectionMatrix[:]); err != nil {
            panic(err)
        }

        gl.DrawArraysInstanced(gl.TRIANGLES, 0, 6, int32(bf.NumSprites))
        bf.Empty()
        gl.BindVertexArray(0)
    }
    platform.GLSwap()
}
After drawing a buffer we clear it of all data. In the next iteration of the render loop it will be filled again with calls to QueueRender. This might seem counter-intuitive at first but sprites are usually moving around in the scene or animating which means their data is invalidated very often. For sprites that don’t update often (such as background sprites) we could provide a special type of buffer that clears on demand instead of automatically but this is not currently implemented.
Utility Methods
Renderer has a few utility methods. Most are just wrappers for OpenGL calls.
SetBGColor
Sets the background color. We are unlikely to see this in an actual game but useful for when debugging or building demo apps.
func (r *Renderer) SetBGColor(rgba [4]float32) {
    r.bgColor = rgba
    gl.ClearColor(r.bgColor[0], r.bgColor[1], r.bgColor[2], r.bgColor[3])
}
Resize
Resize sets the viewport to a specific size (in pixels). We typically set this to the dimensions of our window which we initialize with SDL.
func (r *Renderer) Resize(w, h int) {
    r.windowSize.X, r.windowSize.Y = w, h
    r.setProjectionMatrix()
    gl.Viewport(0, 0, int32(w), int32(h))
}
SetCamera
SetCamera creates a translation matrix (see the translation section of tutorial 7).
func (r *Renderer) SetCamera(position math.Vector3[float32]) {
    r.viewMatrix[12] = -position.X
    r.viewMatrix[13] = -position.Y
    r.viewMatrix[14] = -position.Z
}
In our default shader we multiply every vertex with the
view matrix which results to moving every sprite in the
game:
mat4 model = translate_mat * rotate_mat_x * rotate_mat_y * rotate_mat_z * scale_mat;
gl_Position =  view  * model * vec4(vertex, 1.0);
Translating (moving) everything in the game is equivalent to moving the camera. To visualize this, think about taking someone’s picture with your camera. If you want the person to move to the left you can either ask them to move (move the object) or move yourself to the right (move the camera). Both are equivalent, although in the real world you can’t ask the house and trees behind the person to move:).
We also provide a getter to extract the camera position from the world transform matrix:
func (r *Renderer) GetCamera() math.Vector3[float32] {
    return math.Vector3[float32]{
        X: r.viewMatrix[12],
        Y: r.viewMatrix[13],
        Z: r.viewMatrix[14],
    }
}
Depth Testing
The following functions enable and disable depth testing by calling the appropriate OpenGL functions.
// Disable depth testing. You can still control front to back order for whole buffers with
// BufferList.RenderOrder.
func (r *Renderer) DisableDepthTesting() {
    gl.Disable(gl.DEPTH_TEST)
}

// Enable depth testing. A sprite's z value determines it's depth.
func (r *Renderer) EnableDepthTesting() {
    gl.Enable(gl.DEPTH_TEST)
}
Depth testing is important when we have overlapping sprites. In most games this would be true but we leave the option to disable it for games where sprites are placed neatly next to each other like tile-based games. Also, as discussed before, we can achieve sprites overlapping without depth testing using the render order parameter of a sprite.
Transparency
The following functions enable and disable transparency by calling the appropriate OpenGL functions.
func (r *Renderer) DisableAlphaBlending() {
    gl.Disable(gl.BLEND)
}

func (r *Renderer) EnableAlphaBlending() {
    gl.BlendFunc(gl.SRC_ALPHA, gl.ONE_MINUS_SRC_ALPHA)
    gl.Enable(gl.BLEND)
}
We typically want this enabled all the time.
Projection
A projection matrix specifies how sprites are mapped on the display window. By default, OpenGL will map the coordinates on X and Y to the view window. This means that unless our window is square our sprites will be distorted. Setting a projection matrix solves this and also lets us map any coordinate range to the window.
Typically, 3D applications use a perspective projection which makes it so that objects further away from the camera appear smaller (like in the real world). Since we are doing 2D we don’t need this and we will be using an orthographic projection. An orthographic projection removes the Z coordinate and translates the sprites so that they map to the display window in the way that we want. Below is the orthographic projection matrix.
The matrix might look familiar from the shader tutorial. The entries on the diagonal are those of a scaling matrix and the entries on the last column are those of a translation matrix. This in not an accident, the orthographic projection matrix moves and scales our sprites.
Let’s use an example to see how the matrix works. Remember that OpenGL by default shows the region on X and Y as shown below.
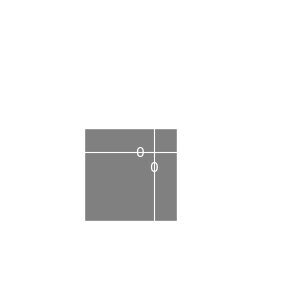
Let’s say we want instead to map to the range like this:
![]()
To do that we would set the matrix parameters as follows: left=0, right=5, bottom=0, top=5. The zNear, zFar parameters define the range of depth values that our sprites get. Setting zNear=-100 and zFar=100 would make it so that we have a range of 200 units for depth. If we plug in these parameters to our orthographic projection matrix we get:
The diagonal values scale our sprites. By scaling by the range which has length 5 gets mapped to the range which has length 2. After the scaling, the translation part in the last column moves everything by one unit to the lower-left. This makes it so that the origin is at the lower left instead of the center.
In code, the process is the following:
func (r *Renderer) SetProjection(center math.Vector2[float32], zNear, zFar float32) {
    r.projectionCenter = center
    r.zFar = zFar
    r.zNear = zNear
    r.setProjectionMatrix()
}

func (r *Renderer) setProjectionMatrix() {
    fw, fh := float32(r.windowSize.X), float32(r.windowSize.Y)
    r.projectionMatrix = Ortho(
        -fw*r.projectionCenter.X, fw*(1-r.projectionCenter.X),
        -fh*r.projectionCenter.Y, fh*(1-r.projectionCenter.Y),
        r.zNear, r.zFar)
}

func Ortho(left, right, bottom, top, zNear, zFar float32) [16]float32 {
    return [16]float32{
        // diagonal (scale)
        2.0 / (right - left), 0, 0, 0,
        0, 2.0 / (top - bottom), 0, 0,
        0, 0, -2.0 / (zFar - zNear), 0,
        // translate column
        -(right + left) / (right - left),
        -(top + bottom) / (top - bottom),
        -(zFar + zNear) / (zFar - zNear), 1,
    }
}
Users call SetProjection to specify a projection center
and the zNear, zFar parameters. The projection center tells
us where we want the origin to be in relation to the application window.
Setting it to
will put the origin at the bottom-left of the application window and
setting it to (0.5, 0.5) will make it so that origin is at the center of
the window. From there we calculate the left, right, top and bottom
parameters of the projection matrix based on the size of the application
window (windowSize). If the projection center is at the
lower-left of the window the left and bottom parameters will be zero and
the right and top parameters will be the application window’s width and
height respectively. If the projection center is at the center of the
screen, left will equal -windowSize/2 and right will equal
windowSize/2 and similarly for top and bottom.
The code allows for setting other projection centers such as the
top-left
which might be more intuitive to some users. By default, renderer is set
to use the lower-left as the origin and if that is acceptable, you don’t
need to ever use SetProjection.
It is important to note that the projection matrix is created based
on the dimensions of the application window. These are provided to the
renderer in Resize which calls
setProjectionMatrix as well. It is the user’s
responsibility to capture window resize events (possible though the
agl/platform package) and call
render.Resize.
In the Render method we pass the projection matrix to
our shaders as a uniform (every shader is assumed to have this uniform).
It is applied in the last step of the vertex shader:
gl_Position = projection * view * model * vec4(vertex, 1.0);Comments
This concludes the rendering section of our game engine tutorial. In the next tutorial we will build a demo app to showcase our renderer.