Sprite Atlas
A sprite atlas is a collection of sprites that are stored in a single image which becomes a single texture when rendering using OpenGL.
By storing many sprites in one texture we gain significant performance benefits as switching textures is a costly operation. We saw how we can render sprites out of a sprite atlas in the animation tutorial but we did so in an ad-hoc way for illustration purposes. Sprite atlases are central to our 2D engine so here we will define a proper data structure for them. This is the atlas definition in AGL:
type Atlas struct {
    // atlas
    atlasImage   *image.RGBA
    entries      []atlasEntry
    atlasTexture uint32 // OpenGL texture of Atlas
    xIncrements  []int
    yIncrements  []int
    imagesToAdd  []string
}
For now, the important fields are atlasImage which
stores the atlas image in RAM, atlasTexture which is the
GPU-side version of the atlas image and entries which
stores information about the sprites stored in the atlas. The
entries field stores the location of sprites on the atlas.
It’s a list that stores entries of this type:
type atlasEntry struct {
    box    math.Box2D[int]
    source string
    used   bool
}
The most important information in this type is box which
is a bounding box (pair of 2D points) that tells us the location of
sprites on the atlas.
type Box2D struct {
    P1, P2 Vector2[int]
}
Here is an example:

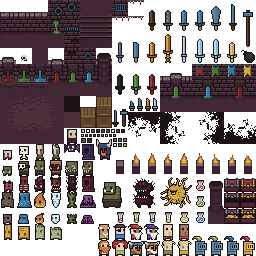
This atlas image is
.
The sprite in the blue border will have an entry in entries
with the values P1:{0,0}, P2:{16,16}. The sprite in the
green border will have P1:{32,16}, P2:{48,32}. These values
are useful to create uv (texture) coordinates for rendering.
The source field in atlasEntry tells us the
originating source image for that specific sprite. We use this when we
add images to the atlas to make sure that we don’t add duplicate
sprites. The field used is a flag that we can set to false
to signify that the space of that sprite can be reused if we no longer
need it.
Creating an Atlas
Usually we create an atlas by incrementally adding images to it. Alternatively, we can load an atlas created with an external program such as Libresprite. The functions for doing both are below:
// Initialize an empty atlas of given size
func NewEmptyAtlas(width, height int) (*Atlas, error) {
    return NewAtlas(image.NewRGBA(image.Rect(0, 0, width, height)), nil)
}

func NewAtlas(atlasImage *image.RGBA, spriteBoundingBoxes []math.Box2D[int]) (*Atlas, error) {

    if !OpenGLInitialized {
        return &Atlas{}, errors.New("OpenGL not initialized")
    }

    atlas := Atlas{
        atlasImage: atlasImage,
        entries:    []atlasEntry{},
    }

    for i := range spriteBoundingBoxes {
        atlas.entries = append(atlas.entries, atlasEntry{
            box:    spriteBoundingBoxes[i],
            source: randSource(),
            used:   true,
        })
    }

    atlas.xIncrements = append(atlas.xIncrements, 0)
    atlas.yIncrements = append(atlas.yIncrements, 0)

    var err error
    if atlas.atlasTexture, err = textureFromRGBA(atlas.atlasImage); err != nil {
        return nil, err
    }

    return &atlas, nil
}
In this tutorial we will focus on creating the atlas incrementally
which is done by first calling NewEmptyAtlas. This creates
an empty transparent image for our atlas. To add images (sprites) to the
atlas we use the following:
func (s *Atlas) addImage(img *image.RGBA, source string) (int, error) {
    p1 := image.Point{-1, -1}

    // find an empty spot on the atlas
    p1, err := s.findEmptySpot(img.Rect)
    if err != nil {
        return 0, err
    }

    // copy img to atlas and create an entry in spriteBoundingBoxes
    p2 := p1.Add(img.Rect.Max)
    rect := image.Rectangle{p1, p2}
    draw.Draw(s.atlasImage, rect, img, image.Point{}, draw.Src)
    newBbox := math.Box2D[int]{P1: math.Vector2[int]{p1.X, p1.Y}, P2: math.Vector2[int]{p2.X, p2.Y}}

    s.entries = append(s.entries, atlasEntry{
        box:    newBbox,
        used:   true,
        source: source,
    })

    // add new points in increments lists
    s.xIncrements = insertAscending(p1.X, s.xIncrements)
    s.xIncrements = insertAscending(p2.X, s.xIncrements)
    s.yIncrements = insertAscending(p1.Y, s.yIncrements)
    s.yIncrements = insertAscending(p2.Y, s.yIncrements)

    return len(s.entries) - 1, nil
}
This function uses findEmptySpot to find an empty
location on the atlas. Then, using Go’ draw package it copies the image
into the atlas image at the empty spot. The location of the sprite is
recorded in the entries list and the index to that list is
returned. This index is the only information needed to later retrieve
sprite information.
The critical bit in this code is the findEmptySpot
function. A simple way to search for an empty spot on the atlas is to go
pixel-by-pixel through the atlas and check the spot that starts on that
pixel and spans the size of the image we want to add.
func (s *Atlas) findEmptySpot(rect image.Rectangle) (image.Point, error) {
    for y := range s.atlasImage.Rect.Dy() {
        for x := range s.atlasImage.Rect.Dx(){
            spot := math.NewBox2D(x, y, x+rect.Dx(), y+rect.Dy())
            if s.spotEmpty(spot) {
                return image.Point{x, y}, nil
            }
        }
    }

    return image.Point{}, errors.New("Atlas full")
}
To check if that spot is empty we use this function:
// check if spot is empty
func (s *Atlas) spotEmpty(box math.Box2D[int]) bool {
    if box.P2.Y >= s.atlasImage.Rect.Dy() || box.P2.X >= s.atlasImage.Rect.Dx() {
        return false // doesn't fit
    }

    for i, bb := range s.entries {
        if !s.entries[i].used {
            continue
        }
        if bb.box.Overlaps(box) {
            return false
        }
    }
    return true
}

func (b Box2D[N]) Overlaps(other Box2D[N]) bool {
    return b.P1.X < other.P2.X &&
        b.P2.X > other.P1.X &&
        b.P1.Y < other.P2.Y &&
        b.P2.Y > other.P1.Y
}
This checks every existing entry in the atlas and if none overlap
with the spot we are testing then we can use it. Unused entries are not
checked which lets us reuse their area. Checking at every pixel of the
image against all existing entries sounds like a lot of work but
building the atlas is done at loading time, not when we are rendering,
so we can afford a bit of slowness. Even so, we can speed things up by
taking advantage of the fact that if we check a location and we find
that it is occupied by a sprite then we don’t need to check other
locations within that entry. A way to achieve this is to not check each
pixel of the atlas but instead check the edges of existing entries. This
is the purpose of the xIncrements and
yIncrements arrays in the atlas. When we add an image at a
position in the atlas, we store the corners of that position into these
arrays. We then iterate by these increments instead of one-by-one
pixel:
func (s *Atlas) findEmptySpot(rect image.Rectangle) (image.Point, error) {
    for _, y := range s.yIncrements {
        for _, x := range s.xIncrements {
            spot := math.NewBox2D(x, y, x+rect.Dx(), y+rect.Dy())
            if s.spotEmpty(spot) {
                return image.Point{x, y}, nil
            }
        }
    }

    return image.Point{}, errors.New("Atlas full")
}
The addImage method is the basis for a number of utility
functions in AGL that add images to the atlas such as
AddImageFromFile seen below:
func (a *Atlas) AddImageFromFile(filename string) (int, error) {
    if index, exists := a.sourceExists(filename); exists {
        fmt.Println(filename, " already added")
        return index, nil
    }
    img, err := imageutil.RgbaFromFile(filename)
    if err != nil {
        return 0, err
    }
    i, err := a.AddImageWithSource(img, filename)
    return i, err
}

func (a *Atlas) AddImageWithSource(img *image.RGBA, source string) (int, error) {
    if i, ok := a.sourceExists(source); ok {
        return i, nil
    }
    i, err := a.addImage(img, source)
    if err != nil {
        return -1, err
    }
    a.UpdateGPUAtlas()
    return i, nil
}
This method reads an image from disk and adds it to the atlas by
calling AddImageWithSource. The image is only added once
because once added, the image’s filename is recorded in the
entries array. If the images was added, we also update the
GPU texture that mirrors the atlas image on the GPU. Updating the gpu
texture is slow so when adding multiple images its better to update the
atlas image for all of them and then update the GPU texture once. In AGL
we provide utility functions to do this called AddImages
and AddImagesFromFiles (their implementation can be found
in the source).
An Example
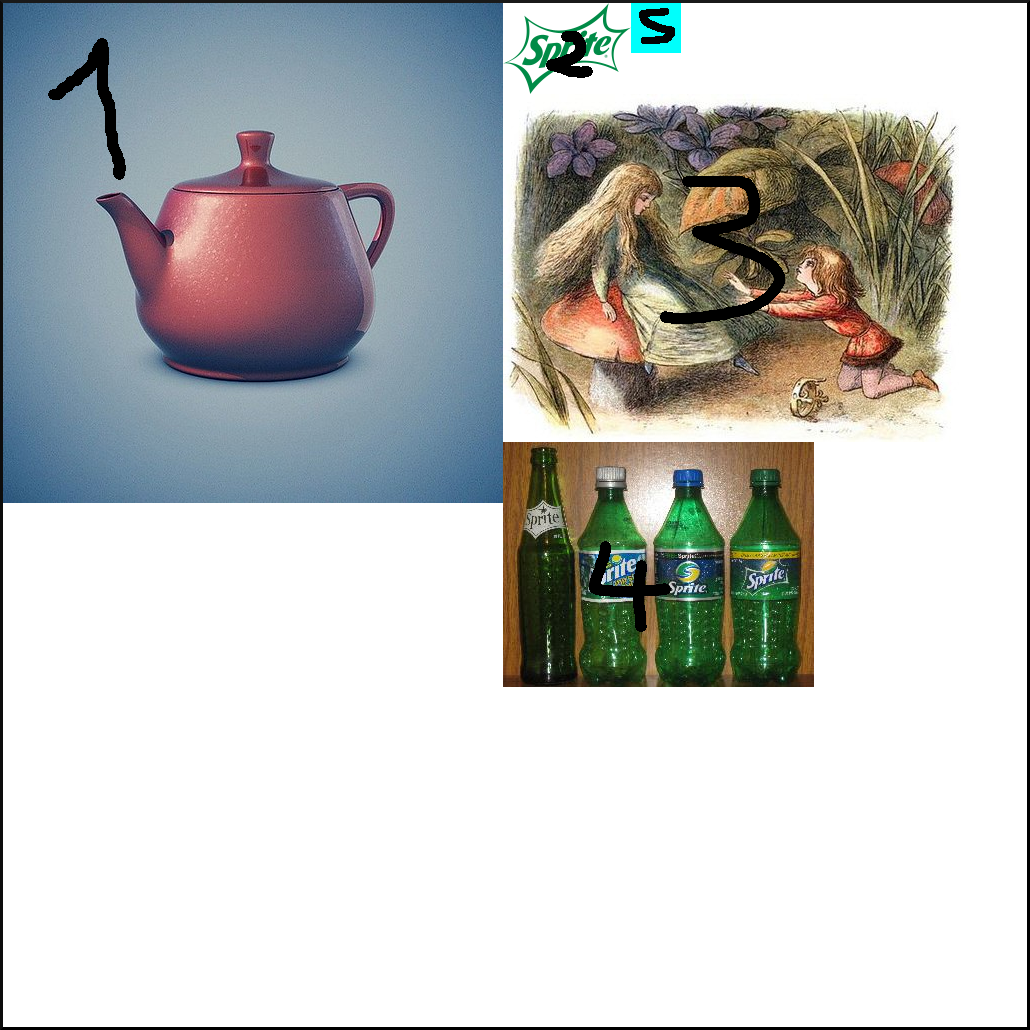
Lets look at an example of how the process works. We have the following ‘sprites’ that we want to add in an empty atlas (not shown to scale):
![]()
![]()
![]()
![]()
![]()
We create a 1024x1024 empty atlas and add them using
AddImageFromFile.
atlas, _ := sprite.NewEmptyAtlas(1024, 1024)
atlas.AddImageFromFile("05_sprite1.png")
atlas.AddImageFromFile("05_sprite2.png")
atlas.AddImageFromFile("05_sprite3.png")
atlas.AddImageFromFile("05_sprite4.png")
atlas.AddImageFromFile("05_sprite5.png")
This will produce the following atlas:
The first image is added to the top-left corner of the atlas because the atlas is empty. The second image is added to the right of the first because our method for finding an empty spot scans left-to-right then top-to-bottom. The third cannot be added to the right of the second because there is no free space (it would exceed the width of the atlas) so it is placed below it. Same goes for image 4. The fifth image is placed next to 2 because we always scan for free spots starting from the beginning. This lets us reuse the empty space that left.
Now lets look at what happens if we add the images in this order: 1, 3, 4, 2, 5:
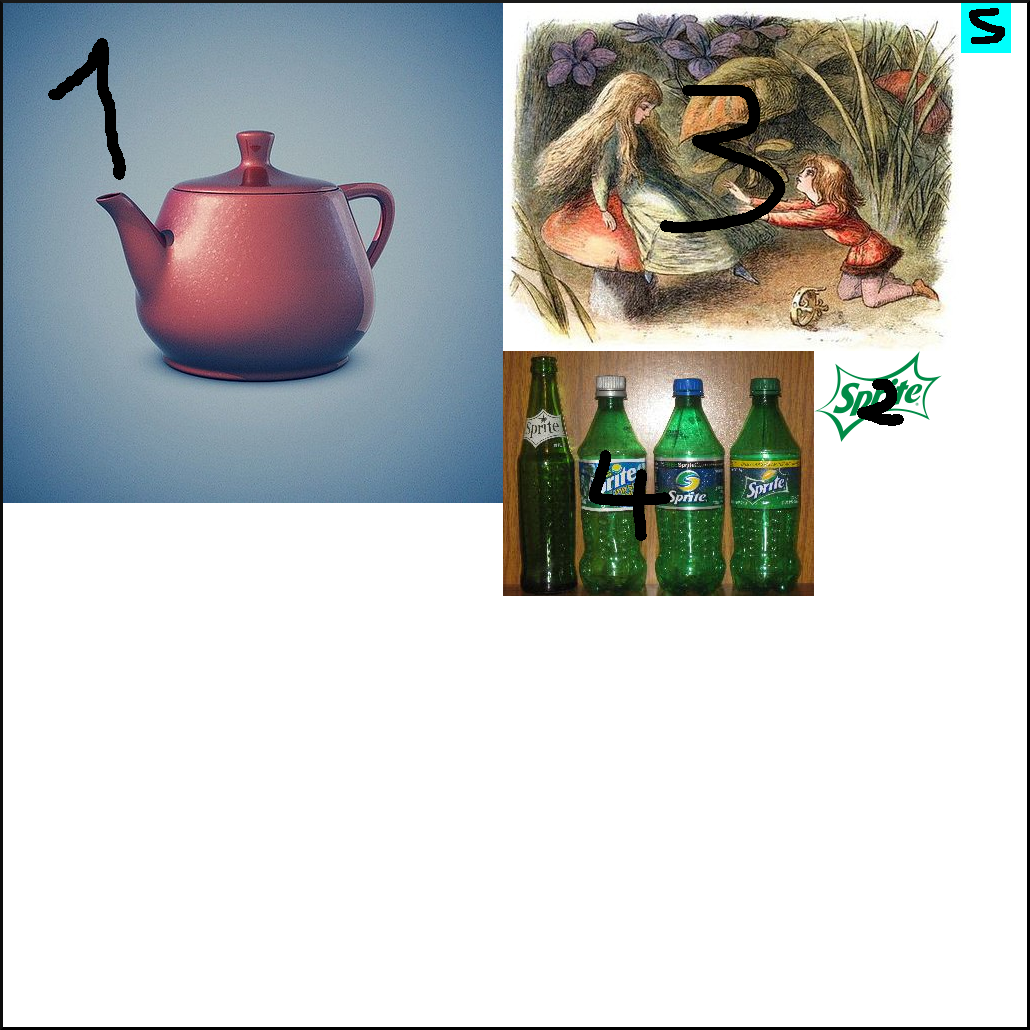
With this order the atlas is more tightly packed which leaves more
space for adding sprites later. This is because we added the images by
descending area. This is generally a good strategy and in the AGL
implementation we provide a method, AddImagesFromFiles,
that can sort images by area before adding them.
Using the Atlas for Rendering
To use the atlas to render sprites we must have the atlas image as a
texture which our implementation already does. We also need UV
coordinates that for the sprites that we want to render. We get these
using the GetSpriteUVs method:
// Get UVs for a sprite. Normalizes and returns the bounding box coordinates in a single 4-vector.
func (s *Atlas) GetSpriteUVs(index int) [4]float32 {
    box := s.entries[index].box
    img := s.atlasImage

    return [4]float32{
        // y min/max is flipped because image origin is top left but opengl is bottom left
        float32(box.P1.X) / float32(img.Rect.Dx()),
        float32(box.P2.Y) / float32(img.Rect.Dy()),
        float32(box.P2.X) / float32(img.Rect.Dx()),
        float32(box.P1.Y) / float32(img.Rect.Dy()),
    }
}
This simply normalizes the spite’s location by dividing it with the
image length. Because the origin of the image is the top-left corner and
OpenGL is bottom-left, we flip the Y coordinates. To identify sprites
within the atlas we use an integer, index, which points
into the entries array. This is returned by the
AddImage... methods of Atlas. So if we wanted
to render image 1 from the previous example we would do:
renderer := NewRenderer()
atlas, _ := sprite.NewEmptyAtlas(1024, 1024)
index, _ := atlas.AddImageFromFile("05_sprite1.png")
sprite, _ := sprite.NewSprite(index, atlas)
renderer.QueueRender(sprite)
We haven’t seen what renderer and sprite do yet. These are covered in later tutorials.
Considerations
The packing strategy we use to build our atlas is very simple. It produces good results but it is slow. There exist many1 other strategies for placing rectangles inside a bin that are faster. We chose this simple one because its easy to understand and implement and we don’t care that much about build times since we will be typically building the atlas during loading and not during runtime.
Another option, not discussed in this tutorial, is building an atlas using an external program like libresprite. We will explore this option in a future tutorial.
https://www.scribd.com/document/457472796/1000-ways-to-pack-the-bin-pdf↩︎